

Planting Flowers
Strategies
One of the most important strategies in planting flowers is making sure you have chosen the right flowers for your particular garden. But before that, there are a couple key points involving weather conditions. Best practice is to avoid planting during very hot weather with lots of sun. Try to pick a day to plant that is cloudy―especially if a little rain is in the forecast, as that will eliminate your need to water your flowers. Also, regardless of whether you’re planting annuals or perennials, it is wisest to plant your flowers following the final frost of the season. Even though springtime is usually the favorite time to plant among green thumbs, perennials will do well if planted by late autumn.
When choosing the right plants for your garden, planting strategies vary depending on the type of flower. For example, when considering annuals, different annuals require different sun conditions. For shady conditions, impatiens, begonias, and primrose do best. For partially sunny areas, geraniums, petunias, and chrysanthemums will flourish. In sunny gardens, marigolds, sunflowers, and zinnia do best. Regarding perennials, in shady areas, daffodils, hostas, and bleeding hearts will flourish. For partially-sunny areas, tulips, lily, and some ornamental grasses do well. For sunny gardens, iris, crocus, and black-eyed susans grow best.
Key Information
There are a few easy steps you should follow once you’re ready to plant your flowers.
Step 1
With a hand rake or trowel, loosen the earth, and make sure you take out any excess plant matter such as weeds or grass clumps. Next, apply topsoil to enrich the ground with nutrients, making sure the soil you do apply is specially formulated for annuals and perennials.
Step 2
Add fertilizer crystals to your soil. You can also apply instead a liquid fertilizer later on in the flowering process.
Step 3
Make a hole with your trowel that is bigger in width and depth than the pot the plant was purchased in.
Step 4
Carefully extract the plant from the pot. To do so, lay one hand on top of the soil at the plant’s base, flip the pot upside down and tap the pot’s edging until the entire plant and its root system can be removed. If the extraction is troublesome, use a knife to carefully cut the pot off from the plant. Once the plant is freed from the pot, be sure not to carry the plant by its stem. Carry the plant by the root system instead. If you are planting flowers that are purchased in trays of six or eight, carefully free each plant by nudging the bottoms of the tray beneath each plant.
Step 5
Carefully pull free any roots that may be tangled around the root ball. Next, gently untangle the roots around the bottom of the ball.
Step 6
Insert your plant into the hole you just dug. Then fill in the gaps around the plant and hole with soil, packing the soil down around the roots with your hands. Next, apply some mulch to the area around the plant.
Step 7
Water your plant generously.
Essential Tools
One of the wonderful things about planting flowers in your garden is that the work can be done using minimal tools, all of which are available at your nearest hardware store or home renovation center. The required tools are:
1. Hand Rake
These tools are very durable, made usually of hardwood and carbon steel, such as the Bosmere Carbon Steel Neverbend Garden Rake . This hand rake has a weatherproof handle and features a 13-tooth rake head.
2. Hand Trowel
These tools are not only strong and versatile, but also cheap, ranging in price from eight dollars to eighty-eight cents! For example, the Ames Ergo Gel-Grip Hand Trowel features a stainless steel head, and soft gel grip for comfort. It can be used for a variety of gardening jobs such as weeding, digging, and flattening out the soil around your plant after you’ve planted it into the ground.
3. Watering Can
Watering cans are a convenient alternative to sprinklers or hoses which can easily get tangled or become difficult to move around. For example, the Fiskars 2.6 Gallon Easy Pour Watering Can features a unique 2-handled design to provide optional grip positions. The spout swivels to provide a control of minimum or maximum water flow. Also, the fill-hole is designed to be off to the side of the can so as to minimize the handles interfering with water fill-up.
 Planting Flowers
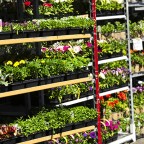 Choosing Annuals
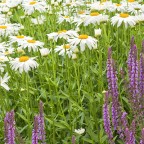 Choosing Perennials
 Fertilizing Flowers
 Potted Flower Arrangements
 Care & Maintenance of Perennials